PRE-REQUISITES:
- 25Live administrator creates a 25Live calendar that meets the department's needs and provides calendar web name (you will need it in step 2).
- MarCom enables the Trumba module on the department's website.
1. Create the main calendar page. If you are new to Drupal, follow the OpenHSU user guide on how to add a new page.
We recommend that you use the word "calendar" in the permalink, e.g. https://cnrs.humboldt.edu/events-calendar. Copy and save this new URL (you will need it in step 2).

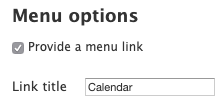
We also recommend that while creating this main calendar page, you add it to your website's menu, by checking the "Provide a menu link" box in the Menu Options:
2. Once you created the main calendar page, select the Customize this page button at the bottom of the page.
![]()
In the Content column, add content using the plus (+) icon in the right corner of the blue header

Adding calendar view tabs:
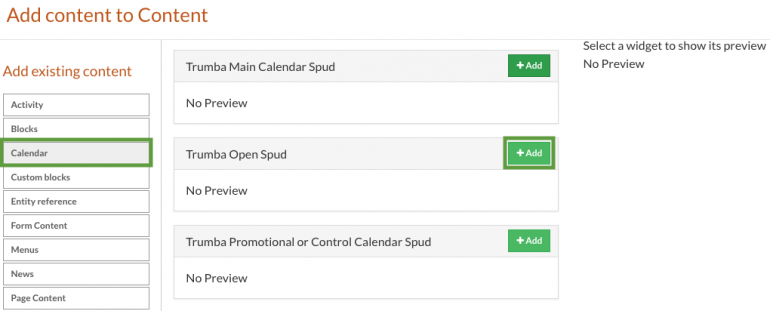
From the left side content options, select Calendar. Then in the available Trumba calendar options, locate the Trumba Open Spud section and select the Add button next to it.
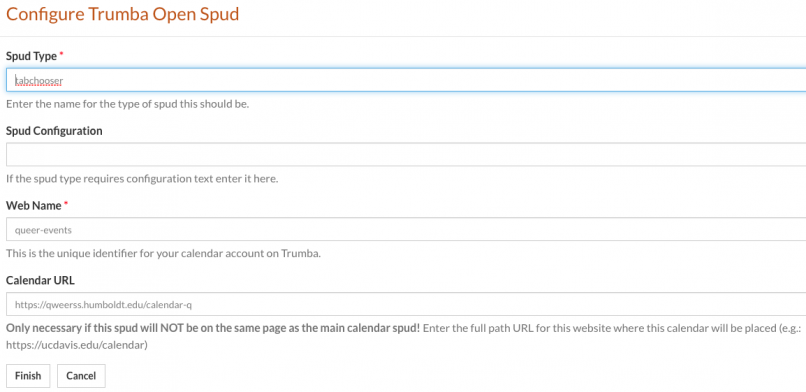
In the Spud Type field type in "tabchooser". In the Web Name field enter the web name provided to you by the 25Live administrator. In the Calendar URL field paste the link to the page on which the main calendar will be located. Click on the Finish button to save the new spud.
Your calendar will now have different views available at the top of it. These views are set up by the 25Live administrator upon your request.

Adding the main calendar:
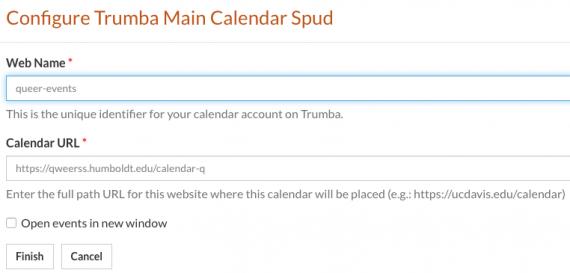
From the left side content options, select Calendar. Then in the available Trumba calendar options, locate the Trumba Main Calendar Spud section and select the Add button next to it.
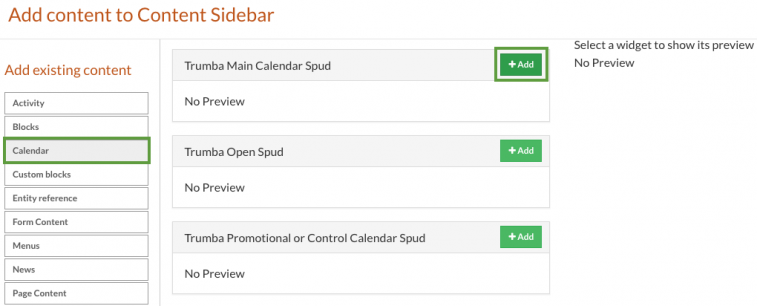
In the Web Name field enter the web name provided to you by the 25Live administrator. In the Calendar URL field paste the link to the page on which the main calendar will be located. Click on the Finish button to save the new spud.
Adding other calendar and calendar-related spuds:
In the Content Sidebar section, add content using the plus (+) icon in the right corner of the blue header:

From the left side content options, select Calendar. Then in the available Trumba calendar options, locate the either Trumba Open Spud or Trumba Promotional or Control Calendar Spud section and select the Add button next to it.
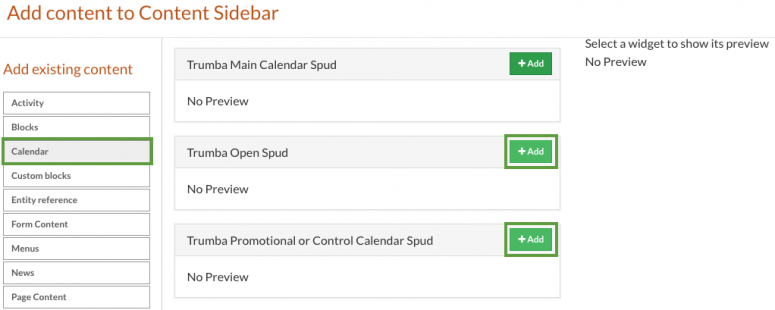
The Trumba Promotional or Control Calendar Spud offers the following pre-designed spud types:
"upcoming":

"datefinder":
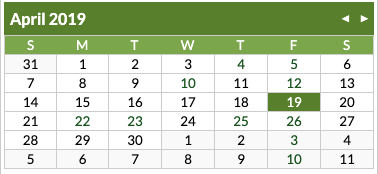
"daysummary":

"filter":

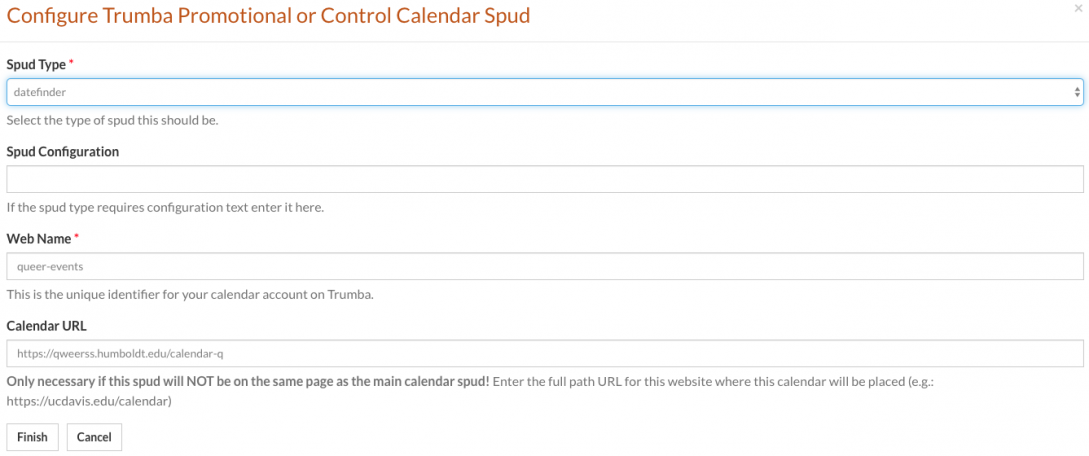
Select the desired Spud Type from the drop-down menu. You may leave the Spud Configuration field blank. In the Web Name field enter the web name provided to you by the 25Live administrator. In the Calendar URL field paste the link to the page on which the main calendar will be located. Click on the Finish button to save the new spud.
If you selected Trumba Open Spud you may manually enter the type of spud you add to your website. The 25Live administrator will provide you with the right spud name. Some of the options include but are not limited to:
"searchlabeled":

"monthlist":
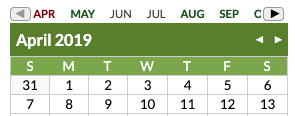
"upcomingfader":
This spud looks just like the "upcoming" spud but it offers a dynamic fading in and out effect.
"upcomingcrawler":
This spud looks just like the "upcoming" spud but it offers a dynamic upwards scrolling of events.
"upcomingslider":
This spud offers a vertical slider of a custom number of events:
Once you have added all the desired calendar components, make sure to click on the Save button at the bottom of the page to save all of the changes.
![]()
For more instructions on how to work with the content panes click here.
